


Ok so, I'm not sure if your aware of buttons. No, not buttons that go on your coat or keep your pants zipped, I'm talking about social media buttons.
Social Media Buttons go on blogs and things, here this is what one looks like.

(Button made by: Deviant Art!)
Now, don't get me wrong, I make my own social media buttons (is it okay with you if I just call them buttons?). I just wanted to show you this one.. Let's get back to the explaining!
buttons usually take you to either
- A person's email
- Their Twitter
- Their Facebook
- Their Google+
- Their Youtube
- Their Flickr
- Their Yahoo
- Their Pinterest
I LOOOVVVEE making buttons! It is so much fun!
I am also going to be telling you how to make buttons!
I have changed my buttons around so many times, I've lost track! So, for you today, I am going to show you all of the buttons I have made! (Whether they work or not!)


(This one is DEFINITELY my favorite.. Too bad it wouldn't really work..)


First, locate yourself a good site, in which to edit on. I use Pic Monkey, its easy and free! (You are also going to want a blank canvas to start out on! I recommend using mine! Click Here! )
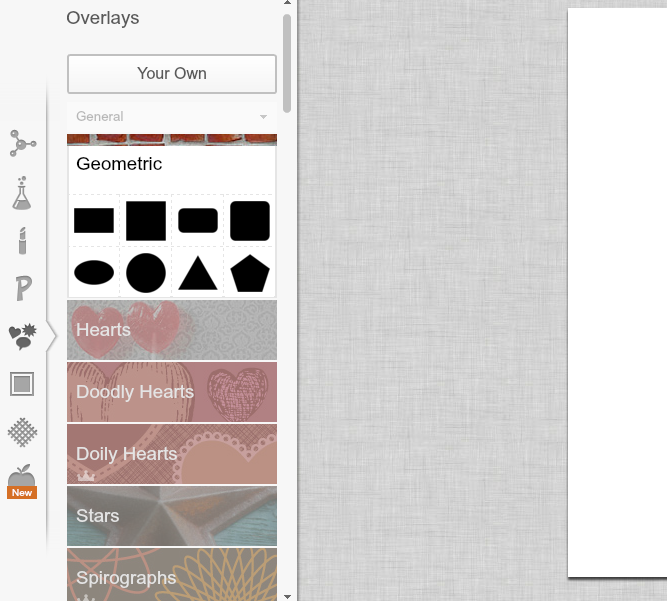
Next, get an idea of what you want your buttons to look like. Squares? Circles? Triangles?
Once you have that, You can pick the shape out of the "Overlays" panel of your site.

After you have the color and size you want your buttons to be, go online and look up the logo of the social media website you are making a button for!

Then, save a photo that you think will go good over top of your shape.

Then, see what color you want the actual logo to be. (I usually change mine to white.)

You can experiment with different boarders, colors, and shapes!
Once your happy with your design save it!
Next, you are going to have to upload your button to Flickr, to give it an HTML code.

After your photo is done uploading, click on it.
You are going to want to look in the right corner, there are a few buttons. Find the one that looks like a box with a arrow coming out.

Click on that button. You will see the HTML code of your image appear. Copy that code!

Next, go to your blog settings. Go to where ever you add widgets or gadgets! Add a new widget, be sure to pick the one that says HTML or Java Script.

Next, paste the code into the box. Now, find the part in the code that says, " http:// www.flickr.com/photos/" and then what ever your numbers are.

Delete that address. Now, if your button is, for example, for Pinterest you would replace that with the address of your Pinterest account.

And so on for all the other "Social Media's". The only one that is different is Email.
If you are making a button for your email you take out the whole http:// part and put in, "mailto:youremailaddress@whatever.com"

Now, press save and you are finished! (You may have to re-size the button, which you can do quickly!)
To re-size your buttons do one of the following,
If you have blogger, like me-
Simply click settings, widgets, and the widget you just added (your button).
Click the button at the top right corner, that says Rich Text.

It should show you exactly what your button looks like.

Now you just have to click on your button and re-size it, the way you would crop something.
For people with out blogger or anything else-
Go back to your buttons code.
Check out the part of the code that says, "width:_ _ height:_ _"

Play around with those numbers until your button is as tall and wide as you would like.
I hope you enjoyed this, and that it wasn't too confusing! I love making these and hopefully you will too!
I just recently made this video on how to make buttons for Youtube! Here it is,
Talk to you soon!,

No comments:
Post a Comment